-
-
Notifications
You must be signed in to change notification settings - Fork 10
Removing Existing Behaviour
This guide will cover creating a mod that removes existing behaviour from the game.
An example of when you may want to do this is if there is an undesirable piece of behaviour in the game that you feel detracts from the overall experience. In my case, I found it frustrating getting stopped whenever I'd walk into the building at Galdin Quay to remind me of the photo contest that ended many years ago. This example will replicate part of that mod to illustrate how behaviour can be removed in this way.
The first step as covered in the first part of this guide is to locate the script you wish to work with. In my case I just poked around in files under the Galdin Quay folder until I found what I wanted, but this was at a time before we had Lucent and before Flagrum could bulk export scripts. Now it would likely be easier to use the script searching method from earlier. The script in question ended up being:
data/level/world/area_leide/map_galdin/location/map_le_gq_a_location.xml
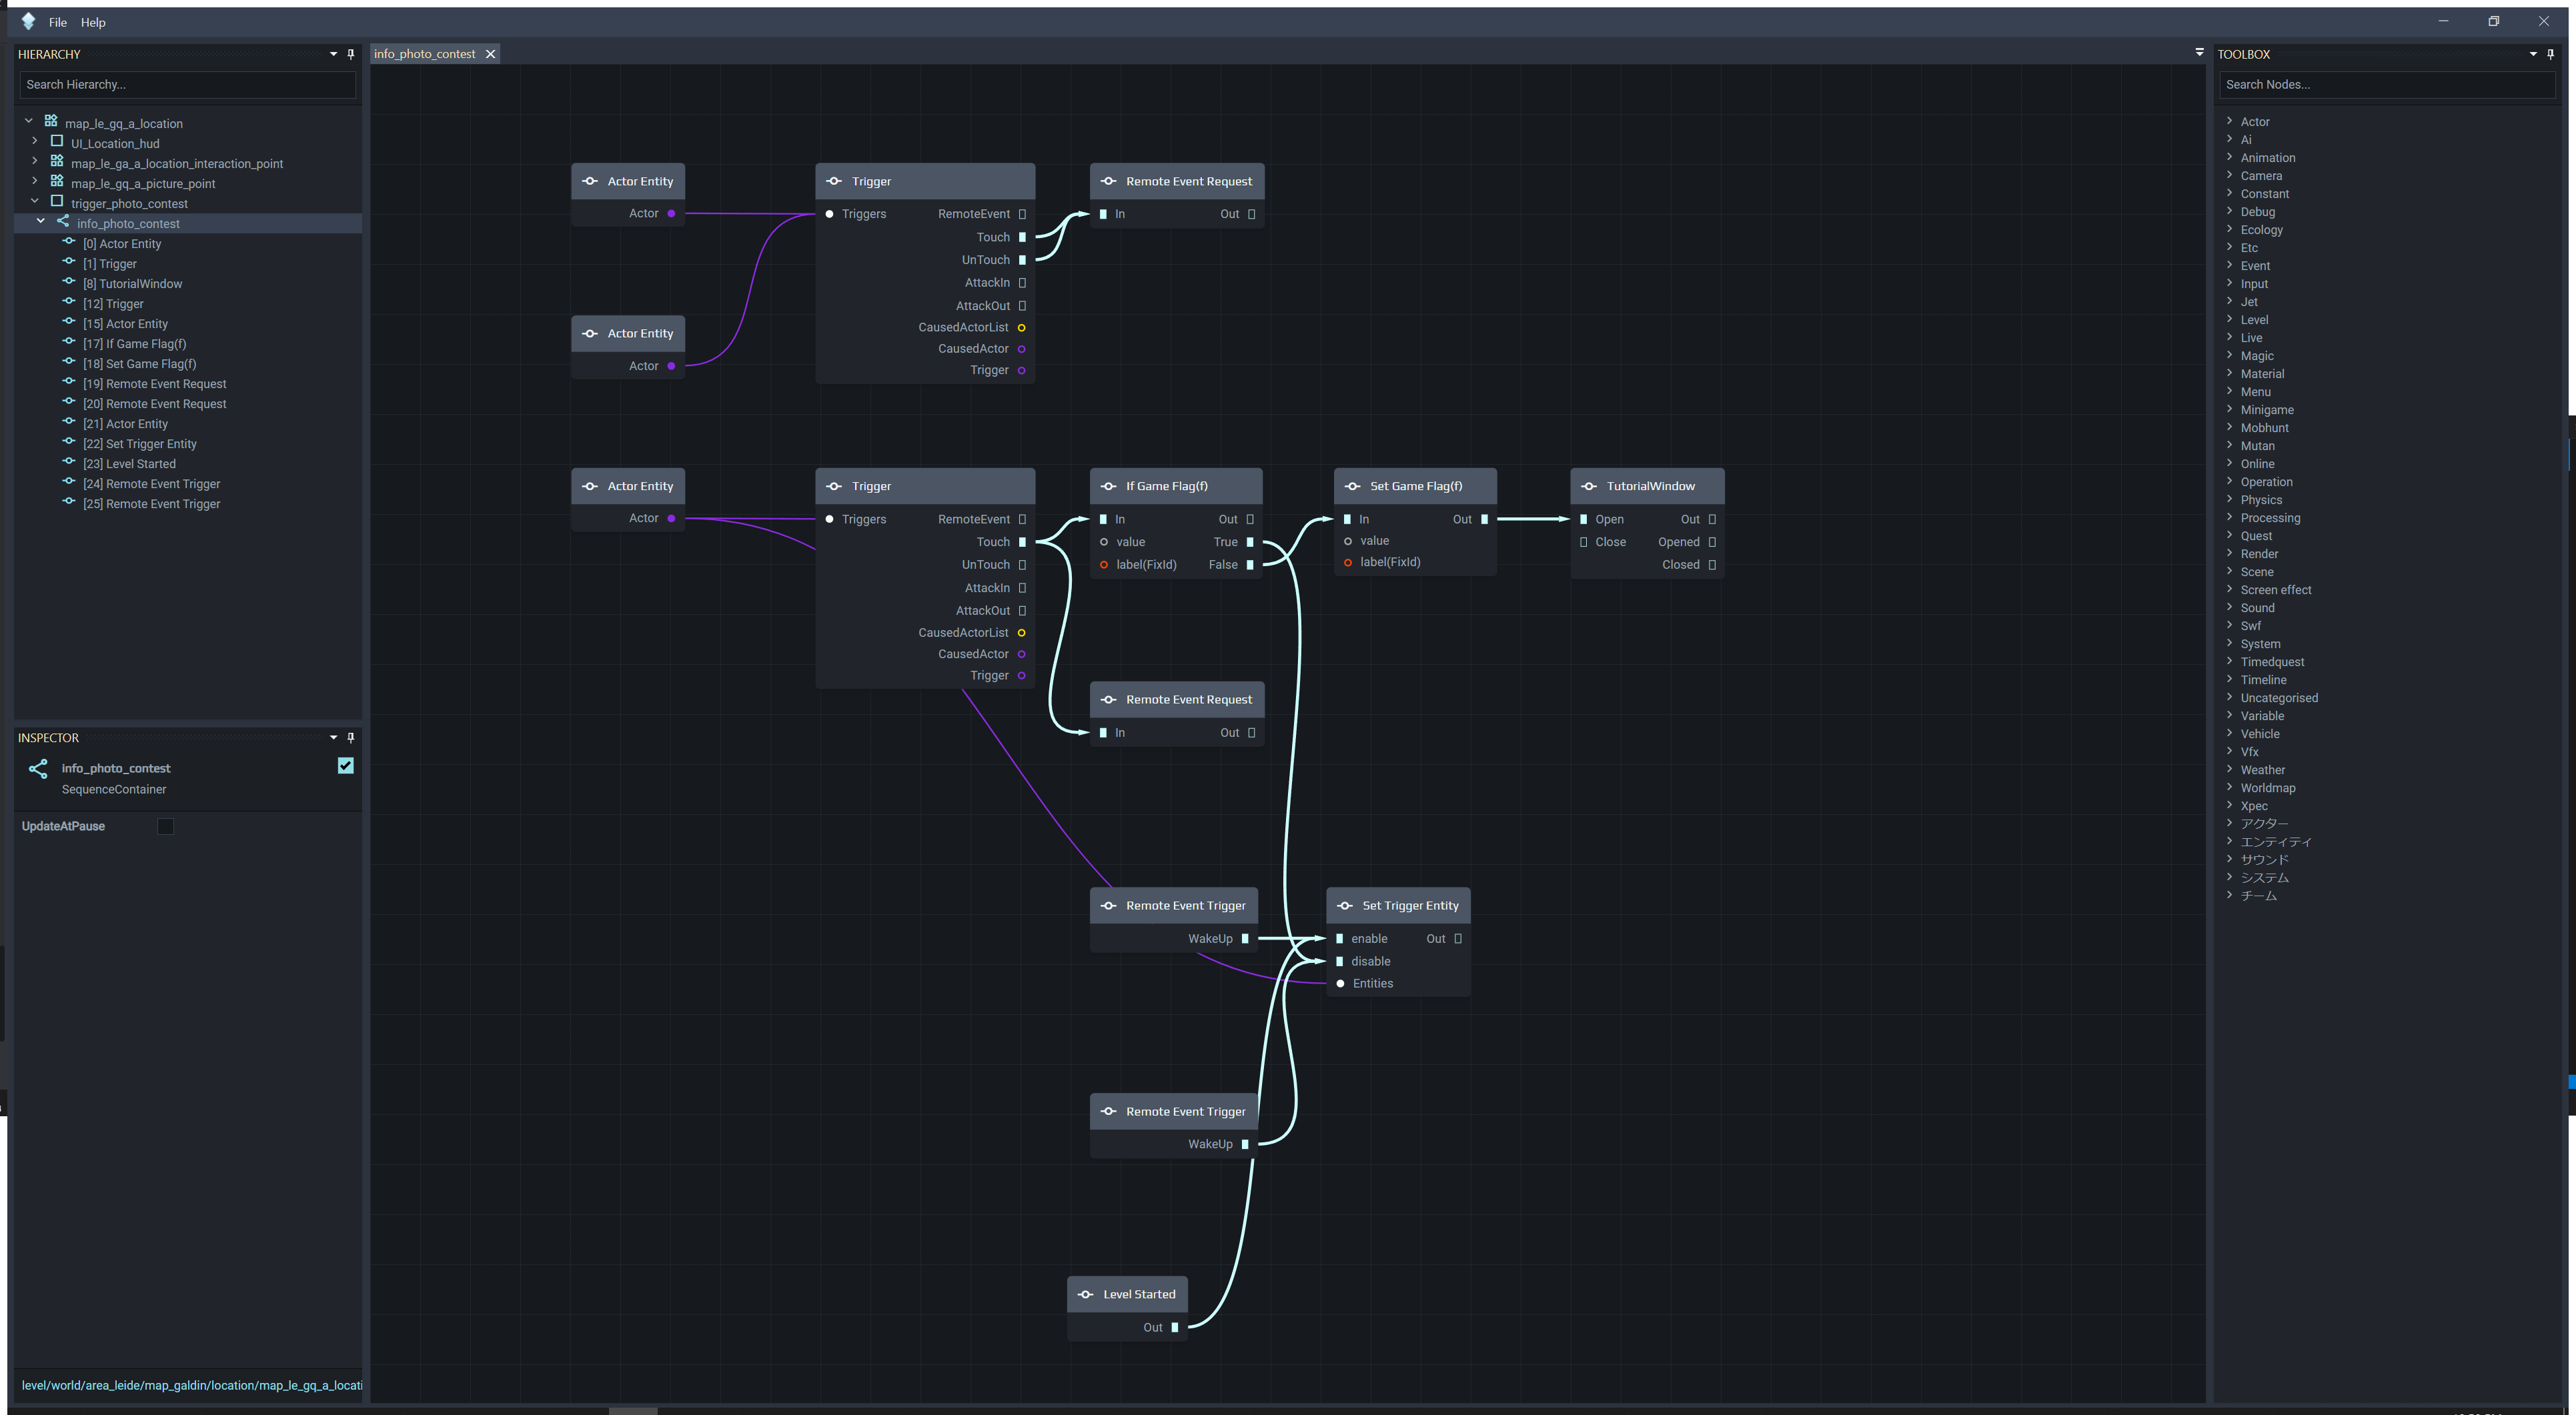
Upon importing this script into a Lucent project, you'll get a list in the "hierarchy" panel to work with. The very obvious name trigger_photo_contest is the one we need to work with, so that is expanded, revealing a sequence container named info_photo_contest. Double-clicking this sequence container opens it in the sequence editor.

It's not super obvious what's going on here at a glance. Unfortunately the layout of the scripts was not preserved when the game was shipped, so Lucent uses an algorithm to lay the node graph out the best it can with the information it has. While this does work very well and saves countless hours, it's not quite perfect. Sometimes it can help to move things around a little to make it easier to read. I personally like to try and separate each control flow out into groups to make it easier to follow, and to rearrange nodes to get as few connections crossing as possible. You can hold shift and drag the mouse to box-select multiple nodes at once to make this process easier. This step is entirely optional, and there's no need to get to perfect with it. However, it can be worth doing as Lucent will remember the position of the nodes after you save your project.

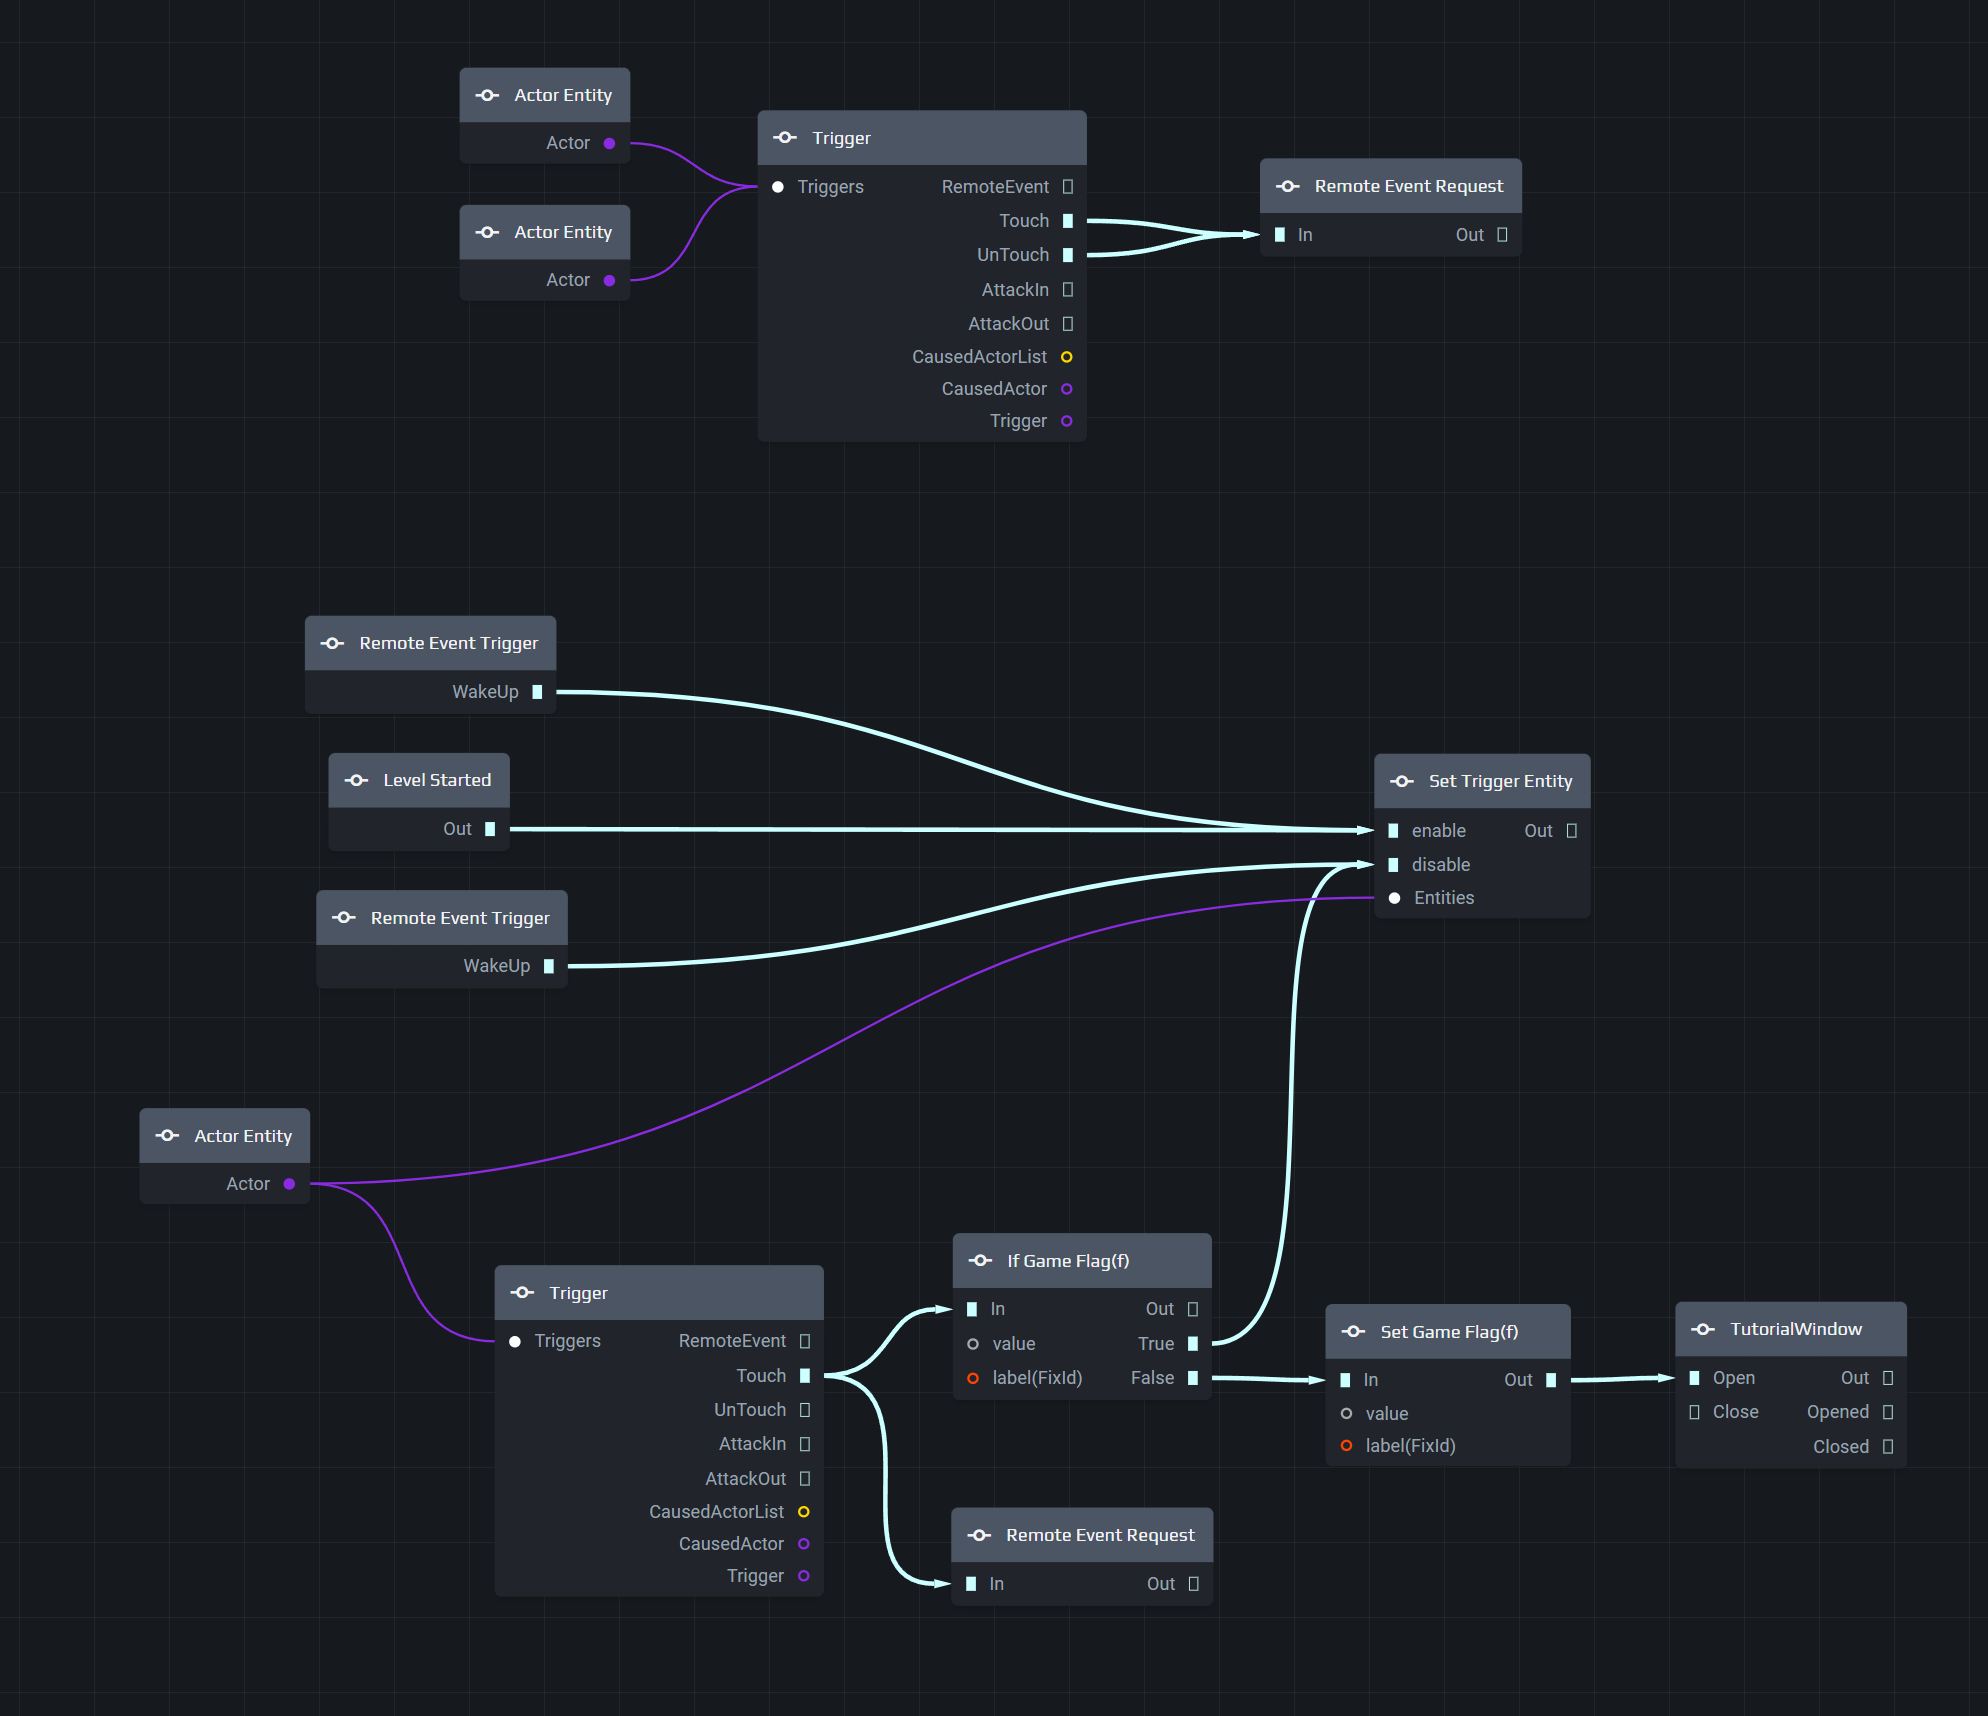
Here it is rearranged.
It's rather obvious looking at these since there are only a small number of nodes that the offending node is the TutorialWindow node. As such, we can ignore the control flows that never make it here. That leaves us with only the bottom Trigger node. Clicking on the Actor Entity feeding into the Trigger node reveals that it's the trigger_in_out_diner actor that will trigger this control flow, and it will trigger on Touch as evidenced by the control flow leaving the Touch pin. What this means is that when Noctis enters the diner (touches the trigger zone), the control flow will activate. This is why the popup shows when walking into the building.
You will then notice that this feeds into the If Game Flag(f) node. What this node does is it checks a game flag to see if it matches a certain condition, and then the control flow will go one of two directions depending on whether the condition is met or not. Clicking on this node reveals that the condition is that the flag with the label HU_TOWN_HH_PHOTO_CONTEST_ONE_FIRST is equal (==) to the value 1. It's safe to assume that this must be false at least once, or the popup would never show. Looking at the next node that is connected to the False pin, we see Set Game Flag(f). You'll notice that this is setting HU_TOWN_HH_PHOTO_CONTEST_ONE_FIRST to a value of 1. This is why if you walk directly outside of the building and go back in again, it doesn't show the popup again, because the If Game Flag(f) node is now always going to go out of the True pin instead.
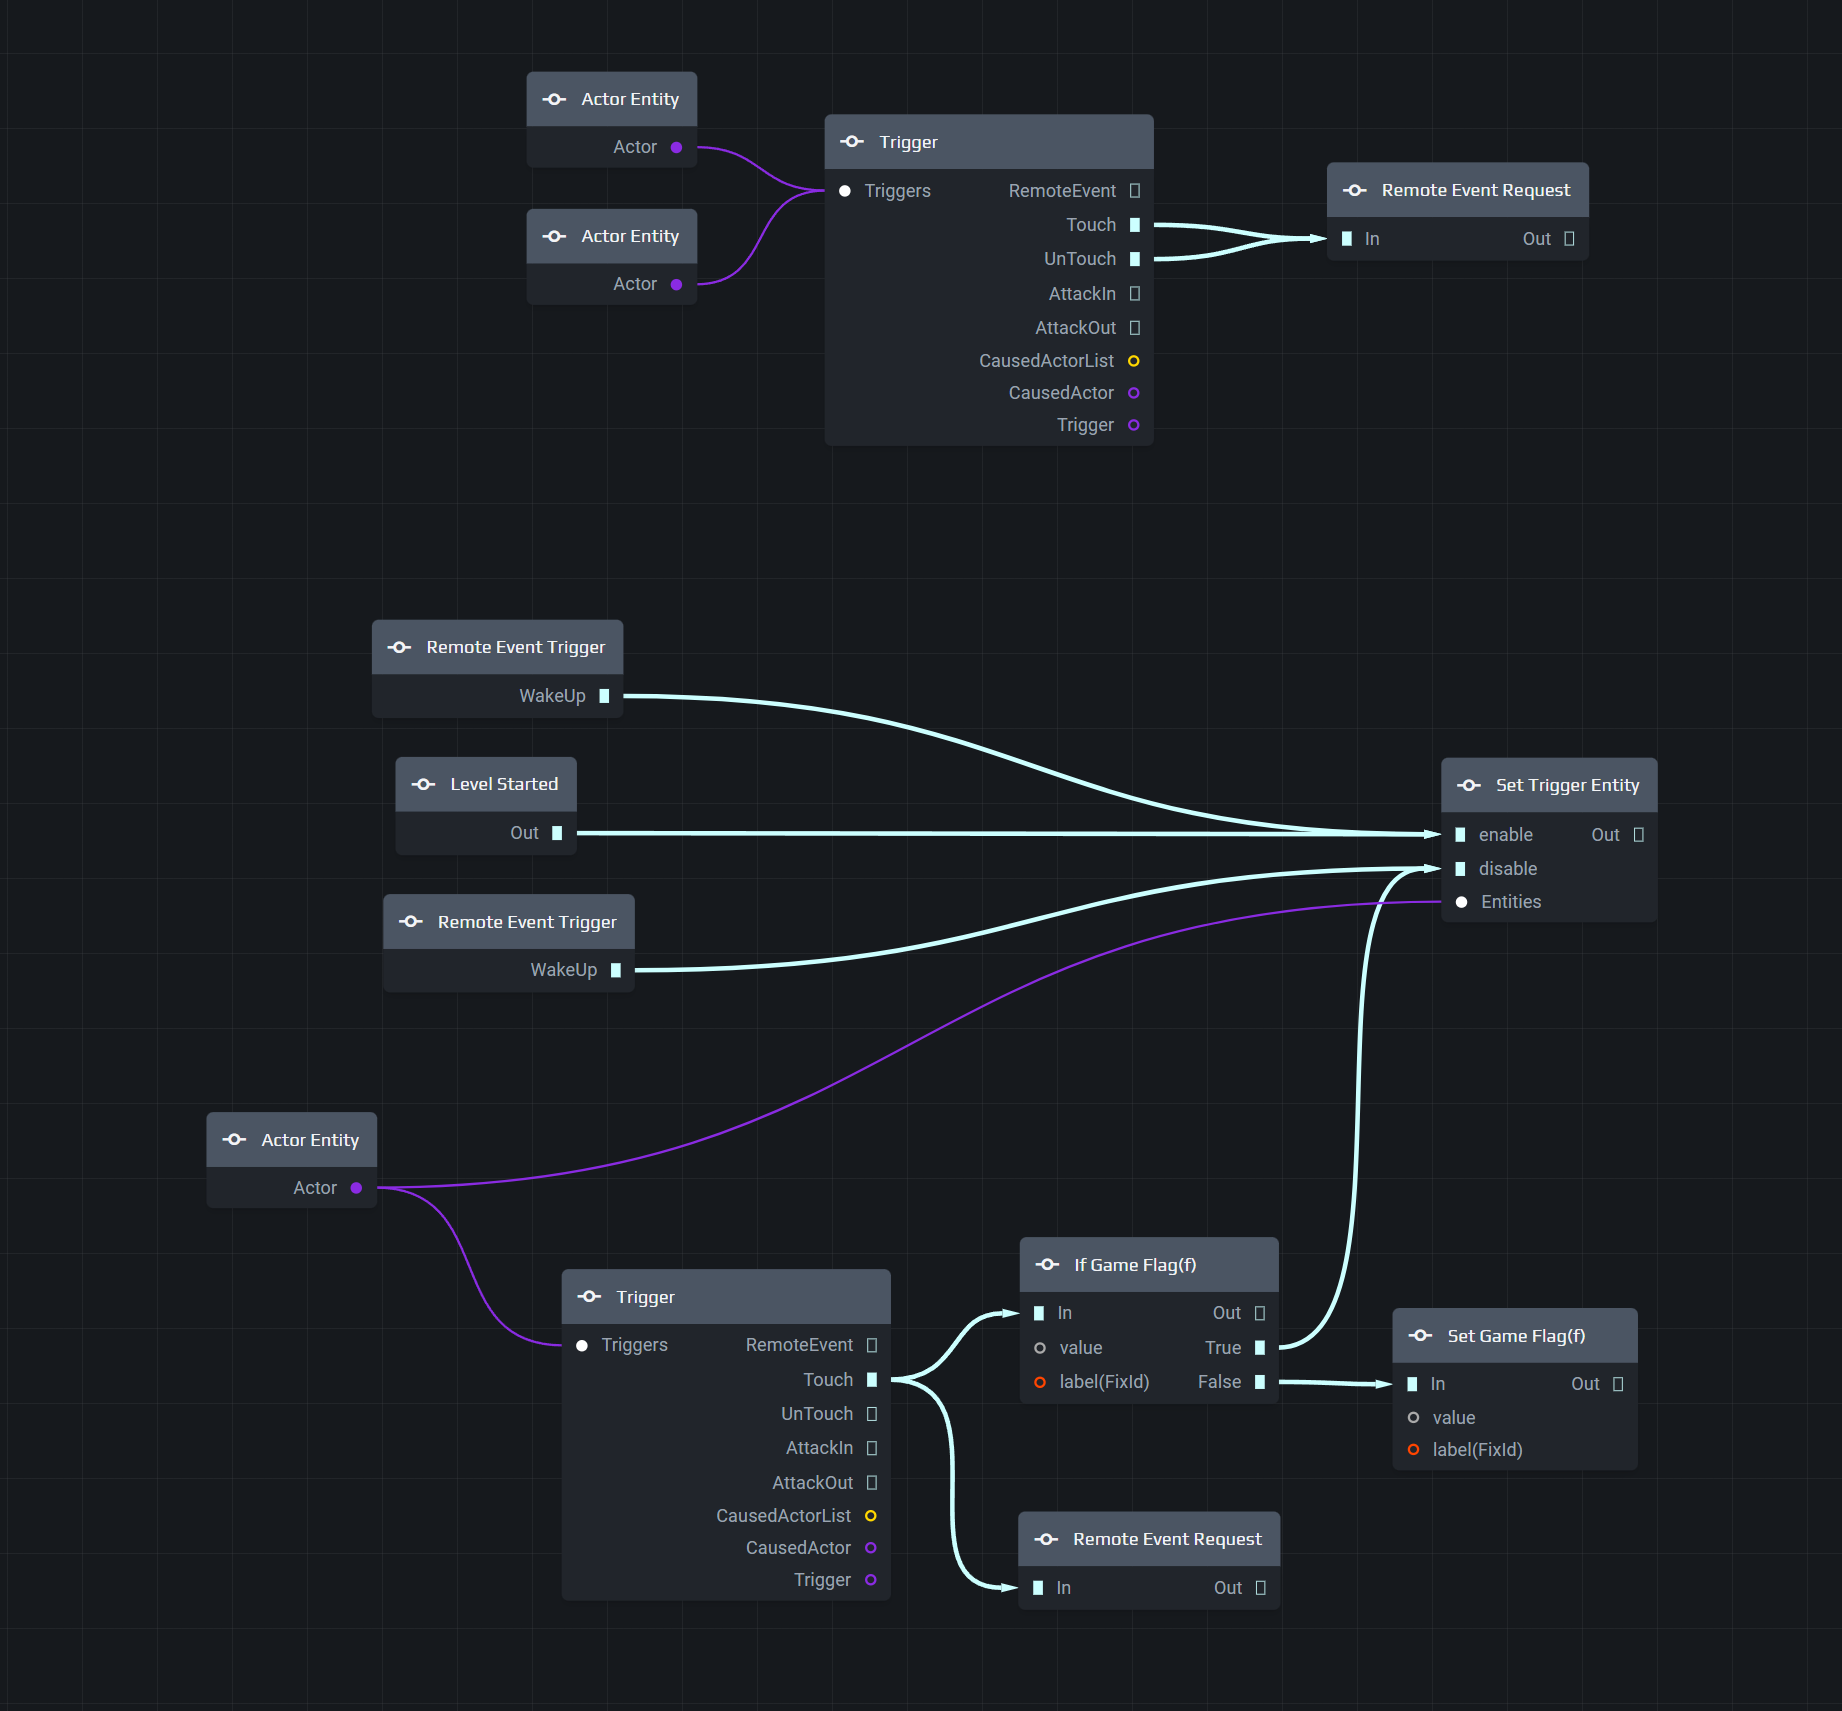
Finally, the Out pin on the Set Game Flag(f) node connects to the Open pin on the TutorialWindow node, which as the name implies will open the popup. Now that we know how this works, it's pretty simple to devise a way to remove this behaviour. The simplest option would be to click the arrow connecting the Set Game Flag(f) node to the TutorialWindow node, and then just hit delete. The control flow never reaches Open and so the popup will never be displayed. However, it's not always efficient to leave extraneous nodes in the graph as they can make the graphs more difficult to read and increase the file size of the resulting script file. As such, I would delete the whole TutorialWindow node instead.
While it may be tempting to now clean up the game flag nodes, I avoided doing so as I'm unsure if that flag is used elsewhere in the game which may be unknowingly affected by further changes to this behaviour. If you do decide to modify the behaviour of scripts more heavily, it would be very advisable to test thoroughly across multiple parts of the game to ensure you haven't introduced any bugs.

The final graph looks like the above.
The final step to making this mod playable is to export it from Lucent to the FMOD format for use with Flagrum. Simply select File > Export as Mod from the top menu, and save the file anywhere you like. This mod can now be installed with Flagrum as you would any other mod. You can further alter the mod inside Flagrum if you wish, but this example doesn't require any supporting files so it is fine to now run the game and test it as soon as it is installed and activated within Flagrum.
While this is a very simple example, you now have a rough understanding of how to locate behaviour for yourself and follow the control flow to figure out the best way to modify the behaviour. Please keep in mind that the actual Photo Contest Removal Mod does a little more than this, as it removes the monitors and posters, as well as the interaction points. Unfortunately this can only be done by hand editing the XML in the environment folder, as those aspects are in environment files, not game scripts.
< Previous: Anatomy of a Visual Script
> Next: Adding New Behaviour
Important Resources
Flagrum
Asset Management
Gameplay Mods
Visual Scripting
- Part 1: Introduction to Visual Scripting
- Part 2: Anatomy of a Sequence
- Part 3: Removing Existing Behaviour
- Part 4: Adding New Behaviour
Script Editing
Preliminary Level Editing
Miscellaneous
Steam Workshop Mods
Full Tutorials
- Creating a Weapon Mod from Start to Finish
- Creating an Outfit Mod from Start to Finish
- Porting an old MO Mod
Advanced Guides
- Setting up Flagrum Materials
- Ambient Occlusion (AO) and Texture Baking
- Metallic/Roughness/Specular (MRS)
- Character Effects (Vertex Colours)
Documentation