In order to run mismas you need to ensure you acquire the following:
- Google Cloud Credentials
- The FFmpeg library
Mismas uses two services from the Google Cloud platform: YouTube Data API to collect metadata for the videos in our collection, and Google's Cloud Video Intelligence API to perform content analysis on those videos. Credentials to access these two services will need to be stored in the credentials folder.
A Google Cloud Platform account is required to use both APIs, options to login or register are displayed in the top right corner of the platform's landing page.
Upon logging in, it is necessary to activate either the free trial or a billing account. This can be done by clicking on the message located at the top of the page. In order to activate the free trial, contact information and credit or debit card details will need to be provided.
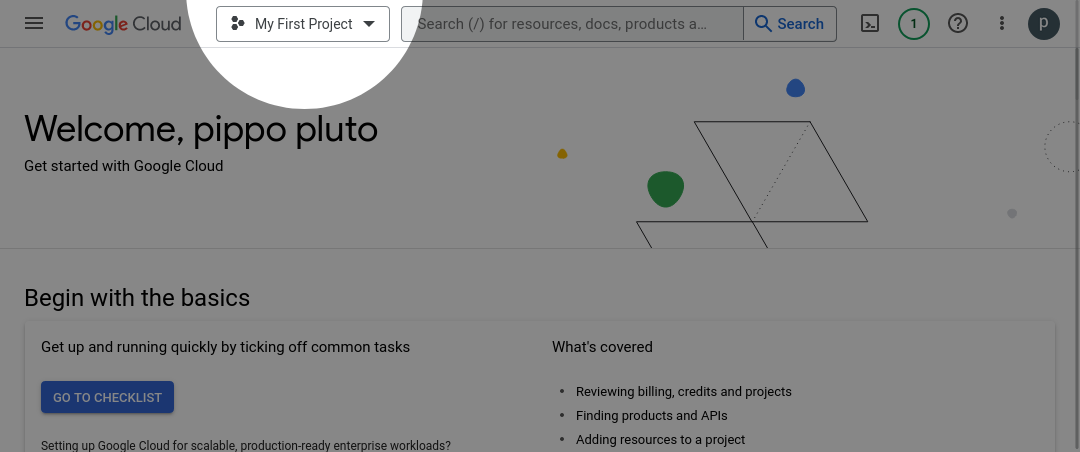
API authorisations within Google Cloud are handled through "Projects". Upon registration, a sample project is automatically created. To create a project, one can click on the drop-down menu located at the top of the page that reads "My First Project", right next to the Google Cloud logo.
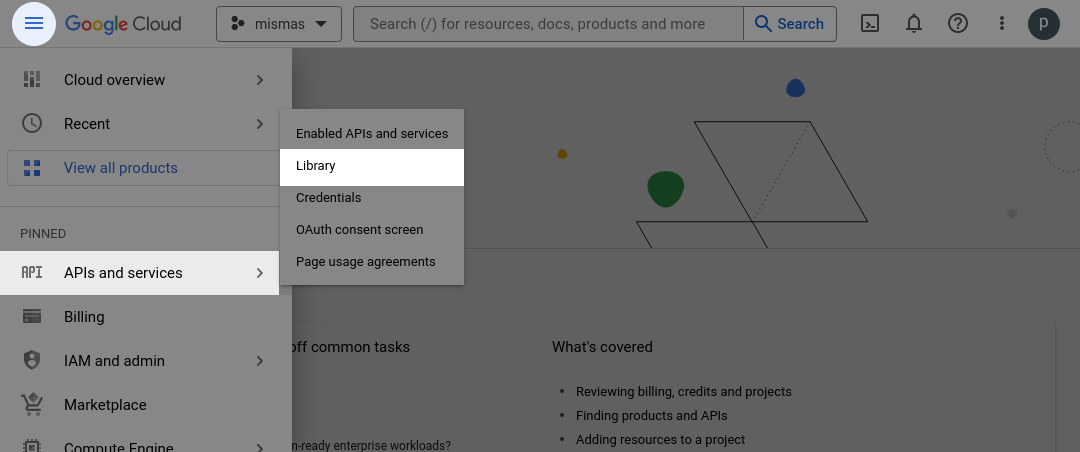
A pop-up window will appear with the option to create a new project in the top right-hand corner of the window. Once the project has been created, the APIs need to be activated. This can be done by selecting "APIs and Services > Library" from the Navigation Menu located at the top left-hand side of the page.
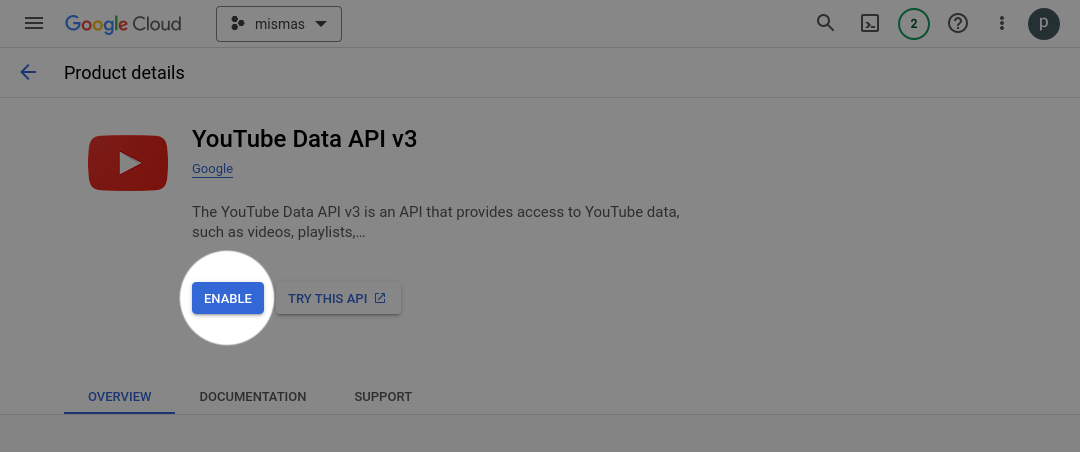
Upon selecting an API, the user will be directed to the "Product Details" page of the chosen API where the service can be activated. The YouTube Data API and Cloud Video Intelligence API can be enabled at this stage.
To authenticate with the APIs, credentials need to be created. This can be done by accessing the Navigation Menu and selecting "APIs and Services > Credentials".
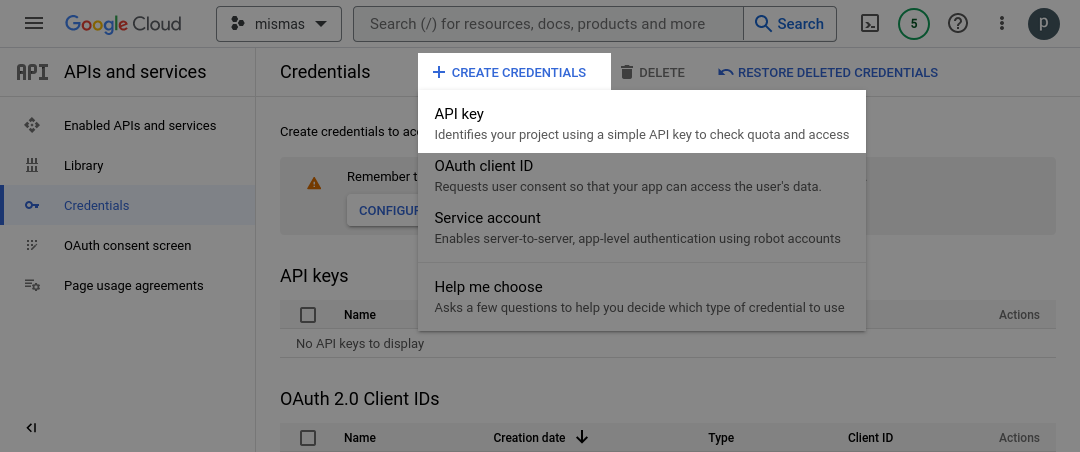
The next step is to create two credentials: an API Key and a Service Account. Selecting "Create Credentials > API Key" will generate an API Key for the project and display it in a pop-up window. The key can then be copied and pasted into a text file named "API Key.txt" which should be saved in the mismas/credentials directory.
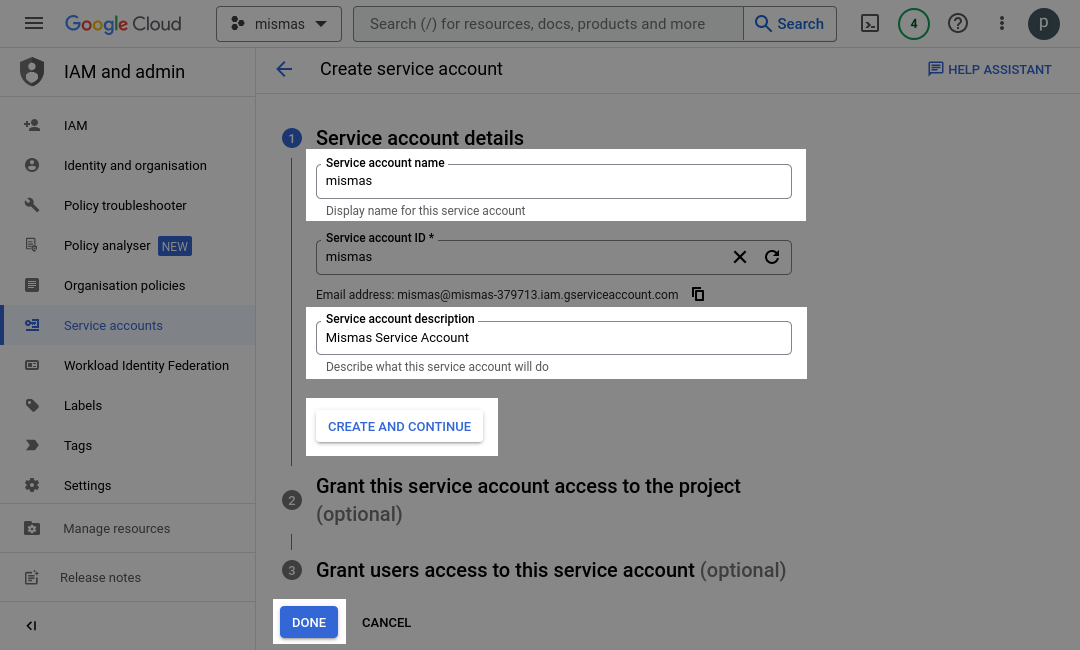
To create a Service Account, click on "Create Credentials > Service Account". Input a name and brief description for the service account, the Service Account ID field will be automatically populated based on the name provided. Selecting "Create and Continue" will create the service account, while the following steps, "Grant this service account access to the project" and "Grant users access to this service account", are optional and can be skipped. Upon completion, click on "Done" to return to the "Credentials" page.
To create the key needed to use the Service Account, scroll down to the "Service Accounts" section of the "Credentials" page and click on the email address associated with the recently created Service Account.
After clicking on the email address associated with the Service Account, the user will be directed to a page displaying the Service Account details. From this page, navigate to the "Keys" tab and click on "Add Key > Create new key".
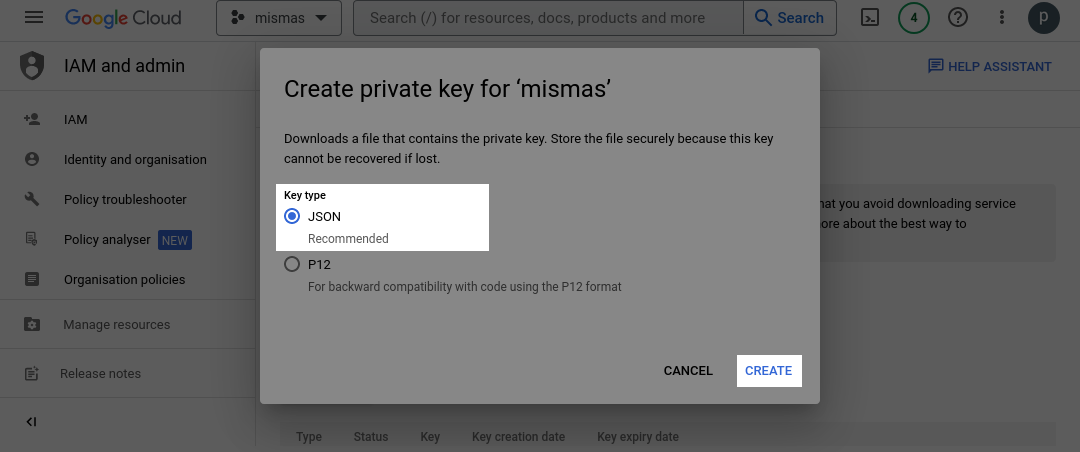
A pop-up window will appear with the option to create the key in JSON format, which will be selected by default. Clicking on "Create" will generate and download the key, which should then be moved to the mismas/credentials directory.
The fastest way to install FFmpeg on your machine is trough a package manager. A package manager is like a personal assistant for your computer. It helps you find, install, and update software programs. Instead of searching for programs on your own and manually installing them, you can use a package manager to take care of this for you by writing a command like install program_name or upgrade program_name.
A package manager is included in most GNU/Linux distributions by default. To install one on Windows or MacOS you can follow the instructions below:
Window's package manager is called Chocolatey, to install it:
- Open the Windows PowerShell as an administrator. You can do this by right-clicking on the Windows Start menu icon and selecting "Windows PowerShell (Admin)" from the context menu.
- Run the following command to allow PowerShell to run scripts:
Set-ExecutionPolicy Bypass -Scope Process -Force
- Run the following command to install Chocolatey:
iwr https://chocolatey.org/install.ps1 -UseBasicParsing | iex
- Once the installation is complete, run the following command to verify that Chocolatey is installed:
choco
This command should display the Chocolatey version number and a list of available commands.
MacOS's package manager is called Homebrew (often abbreviated as brew), to install it:
- Open the Terminal application. You can find it in the Applications/Utilities folder or by using Spotlight Search (Command + Space) and searching for "Terminal".
- Run the following command in the Terminal to install Homebrew:
/bin/bash -c "$(curl -fsSL https://raw.githubusercontent.com/Homebrew/install/HEAD/install.sh)"
- The installation process will ask for your password to grant permission to install Homebrew. Enter your macOS user account password and press Enter.
- Once the installation is complete, run the following command to verify that Homebrew is installed:
brew --version
This command should display the Homebrew version number.
If you already have a package manager installed, you can run one of the following commands based on your operating system:
choco install ffmpeg
brew install ffmpeg
sudo apt install ffmpeg
To verify the library has been correctly installed, you can type
ffmpeg -version
If the installation was successful, the command will display version information for the installed FFmpeg release.
If you prefer to install the library manually, you can do so downloading an FFmpeg's release from the official website' download page and follow one of the tutorials below:
- Installing FFmpeg on Windows by GeeksforGeeks
- Installing FFmpeg on MacOS by BBC's Audio Orchestrator project (both FFmpeg and FFprobe need to be installed)
To download the code in this repository and install all required dependecies, you can run one of the following commands based on your operating system:
git clone https://github.com/lucadra/mismas.git && cd mismas && python setup.py && venv/bin/python main.py
git clone https://github.com/lucadra/mismas.git && cd mismas && python setup.py && venv\Scripts\python.exe main.py
The commands above will download the repository and run the setup file setup.py, which will create a virtual environment and download the required dependencies. Alternatively, the code can be downloaded manually from this page and the setup can be executed by opening a terminal window inside the downloaded folder and running the following command:
python setup.py
Once the setup has been completed, Mismas can be run by launching mismas.sh, or mismas.bat if using Windows.


