-
Notifications
You must be signed in to change notification settings - Fork 26
Home
Nick dos Remedios edited this page Jan 6, 2025
·
12 revisions
Welcome to the biocache-service wiki!
Java JDK (and JRE)
Java 1.8 is required, it can be downloaded from https://www.oracle.com/java/technologies/javase-downloads.html.
Tomcat 8.5 or 9
Tomcat 8.5 or 9 is required, Tomcat 8 download site is https://tomcat.apache.org/download-90.cgi
Source code from Git repository
Clone biocache-service from GitHub https://github.com/AtlasOfLivingAustralia/biocache-service to your local project folder.
IntelliJ project
- Create an IntelliJ project from existing source (File → New → Project from existing sources), select biocache-service sub folder from your project directory,
- Select "Import project from external Maven model"
Run biocache-service in IntelliJ
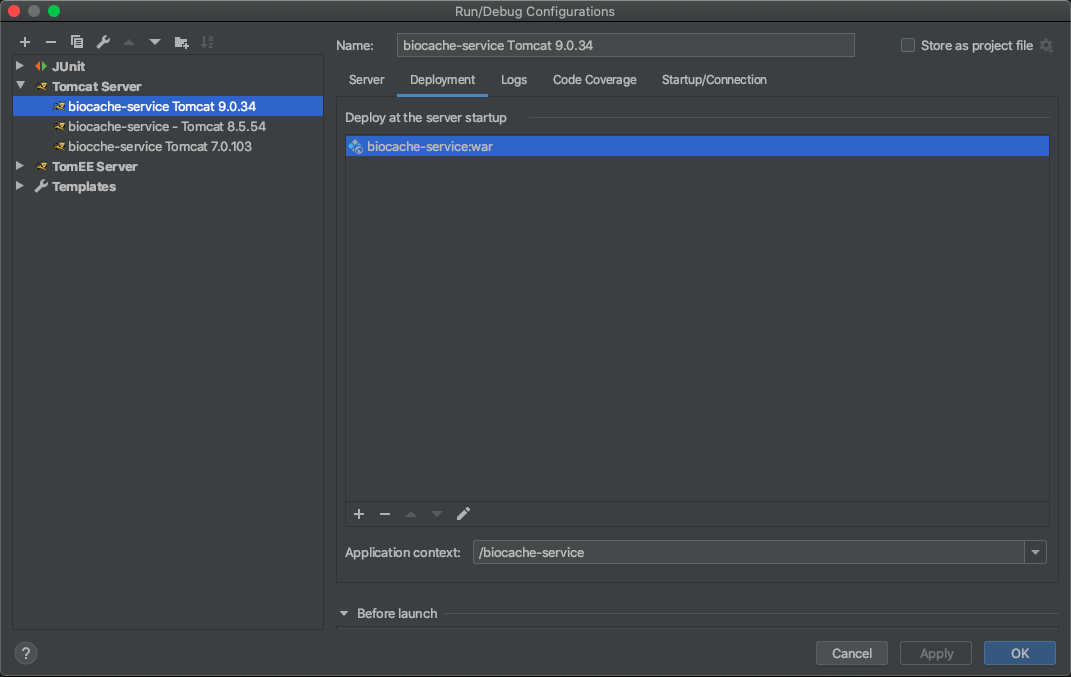
- Create a new Run/Debug configuration, refer the following screens shots for settings:


Notes:
- VM values -Dorg.apache.tomcat.util.buf.UDecoder.ALLOW_BACKSLASH=true -Xmx3G
- You may need to build "biocache-service.war exploded" artifact before selecting it
- Make sure you have a copy of the config file in the /data/biocache/config directory on your computer
- biocache-config.properties
- facets.json
- subgroups.json
- Tunnel to access remote test Cassandra and Solr before starting the local instance of Tomcat. For example, Atlas of Living Australia internal test servers:
-
ssh nci3-cassandra-1.ala -L 9042:localhost:9042(ORssh aws-cass-test-1.ala -L 9042:localhost:9042) -
ssh nci3-solr-3.ala -L 8983:localhost:8983(ORssh aws-solr-test-1.ala -L 8983:localhost:8983) - change local ports if needed
More info about tunnelling here.